Every day you drive your vehicle, you're faced with the potential for damage—tiny rocks that could chip your paint, bird droppings that leave unsightly stains, and UV rays that gradually fade your once-glossy finish. It’s alarming how easily a beautiful car can lose its charm due to these everyday threats. The thought of scratches and stains can be nerve-wracking, not to mention their impact on your car's resale value. Paint protection film (PPF) offers a robust solution to these concerns. This guide will walk you through every step of the installation process to ensure your vehicle remains as stunning as the day you drove it off the lot.
What is Paint Protection Film (PPF)?
Paint protection film (PPF) is a clear, durable urethane layer applied to the exterior surfaces of vehicles to shield them from scratches, chips, and other types of damage. This protective film protects against environmental contaminants such as road debris, bird droppings, and harmful UV rays that can fade and discolour paint over time. PPF is designed with self-healing properties, which means minor scratches can disappear when exposed to heat, ensuring your vehicle maintains its flawless appearance. Installing PPF not only preserves the aesthetic appeal of your car but also enhances its resale value by keeping the original paint in top condition.
How PPF Protects Your Car
Driving exposes your vehicle to potential daily damage, such as rocks, gravel, or environmental contaminants. PPF absorbs these impacts, keeping your paint intact. Advanced films also feature self-healing technology, where minor scratches disappear with heat from sunlight or a hairdryer, restoring your car’s flawless finish.
- Self-Healing Technology: Minor abrasions can disappear over time, ensuring your car stays pristine without frequent touch-ups.
- UV Protection: This product shields the paint from harmful ultraviolet rays, preventing fading and discoloration caused by prolonged sun exposure.
- Chemical Resistance: It is a barrier against bird droppings, tree sap, and road salts, which can corrode paint.
- Scratch and Chip Defense: The robust layer reduces the likelihood of scratches and chips, keeping your paint in excellent condition.
Enhance and Protect with LLumar PPF

LLumar PPF is designed to protect vehicles and other environmental hazards while maintaining their aesthetic appeal. This advanced paint protection film features self-healing technology that allows it to recover from minor surface scratches, ensuring your car looks pristine. With its clear finish, LLumar PPF preserves your vehicle's original colour and shine, giving you peace of mind and confidence during every drive. Experience the blend of durability and style that LLumar brings to automotive protection.
Types of Paint Protection Film (PPF)
Paint protection film (PPF) is available in various types, each providing distinct benefits tailored to different needs and preferences. The most common types of PPF include:
- Self-Healing PPF: This advanced film features self-healing properties that enable minor scratches and swirl marks to vanish when exposed to heat from sunlight or a heat gun. It’s perfect for car owners looking for durable protection with low maintenance.
- Clear Bra Installation: Typically applied to high-impact areas such as the hood, front bumper, and side mirrors, clear bra PPF offers strong protection against stone chips and road debris while preserving the vehicle's original appearance. This ensures crucial areas are shielded without changing the car's design.
- Matte PPF: For individuals who prefer a matte finish, matte PPF protects the paint while providing a unique look that reduces glare and enhances the vehicle's character. This film is excellent for maintaining the aesthetic of cars with matte paint finishes.
- Standard PPF: This cost-effective option delivers reliable protection against scratches and environmental damage but may lack some advanced features seen in self-healing films. It’s a great choice for budget-conscious owners who wish to protect their vehicle's surface.
PPF Installation Guide: Step-by-Step Process

Installing paint protection film (PPF) can feel overwhelming, but breaking it down into manageable steps makes it easier and less intimidating. This PPF installation guide outlines each phase, giving you the confidence to complete your project, whether you choose a DIY approach or hire professionals. Follow these steps closely to ensure a flawless application that protects your vehicle against scratches and environmental damage.
Step 1: Prepare Your Vehicle Surface
The first step in installing paint protection film is cleaning your car thoroughly. A spotless surface allows the PPF to adhere correctly, avoiding issues like bubbling or peeling later. Wash your vehicle using a gentle car soap to remove dirt and grime, then dry it completely with a microfiber cloth.
- Wash and Dry: Use quality car soap and microfiber towels to clean every inch of the vehicle.
- Inspect the Surface: Look for existing chips, scratches, or blemishes that should be addressed before applying PPF.
- Remove Contaminants: Ensure no wax, grease, or dirt could hinder adhesion.
Step 2: Clay Bar Treatment
A clay bar is essential to ensure an ultra-smooth surface for the PPF. This technique removes embedded contaminants that washing might miss, like tree sap or industrial fallout, providing a perfect foundation for the film. Glide the clay bar over the vehicle's surface, using a lubricant to help it slide without scratching the paint.
- Perform the Treatment: Lightly spray a clay lubricant and run the clay bar across the surface.
- Feel for Smoothness: After treatment, the result should be a noticeably smoother surface.
- Check for Remaining Debris: Ensure all contaminants have been removed to promote optimal adhesion.
Step 3: Apply Isopropyl Alcohol Solution
To further prepare the surface, it is crucial to wipe it down with a mixture of isopropyl alcohol and water. This step helps eliminate any remaining oils or residues that could compromise the adhesion of the PPF during application. It also ensures that the film bonds securely to the vehicle's paint, preventing future lifting or peeling.
- Mix the Solution: Combine isopropyl alcohol with water in a spray bottle for easy application.
- Spray and Wipe: Generously apply the solution to the area where PPF will be installed, using a clean microfiber cloth to wipe it down.
- Allow to Dry: Let the surface dry completely before moving on to the next step.
Step 4: Measure and Cut the Film
Carefully measuring and cutting the PPF is vital for achieving a taut fit that protects against damage. Using a measuring tape, identify the areas you wish to cover and cut the film accordingly. Leave a little extra around the edges to allow for adjustments during the application process.
- Measure with Precision: Use a measuring tape to determine the size of the sections requiring protection.
- Cut the Film: Trim the PPF to size while ensuring extra material is available for a snug fit.
- Check Fit: Place the cut film against the vehicle to confirm coverage before proceeding.
Step 5: Spray the Soapy Water Solution
Applying a soapy water solution ensures the paint protection film installation goes smoothly. The soapy mixture creates a slippery surface that allows you to position and adjust the film easily before it adheres completely. By spraying the vehicle’s surface and the adhesive side of the film, you can significantly reduce the chances of trapping air bubbles and achieve a clean application.
- Mix the Solution: To create an effective slip solution, combine a few drops of baby shampoo with water in a spray bottle.
- Generously Spray: Apply the mixture liberally onto the area where the film will go, creating a lubricated surface for easier adjustments.
- Remember the film: Coat the adhesive side of the PPF to prevent it from sticking to itself and allow for smooth handling.
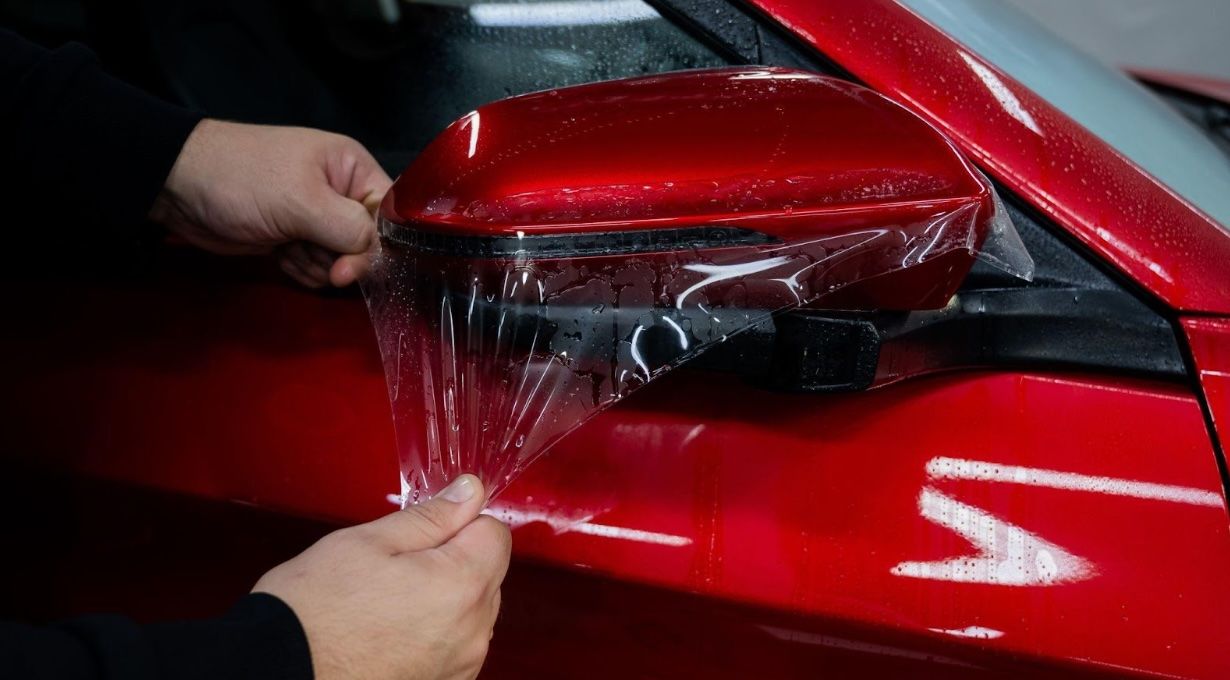
Step 6: Position the Film
It's time to position the paint protection film on the vehicle carefully. This step requires attentiveness and proper alignment, which is crucial to avoid misfits and visible imperfections.
- Remove the Backing: Gently peel away the backing from the LLumar PPF, keeping the adhesive side clean.
- Align with Care: Place the film over the targeted area, ensuring it aligns properly with the edges and contours of your car.
- Adjust as Needed: Thanks to the lubrication, you can easily reposition the film if it’s not perfectly aligned on the first attempt.
Step 7: Squeegee Out Air and Water
After the film is correctly placed, a squeegee is used to push out air bubbles and excess soapy water trapped beneath it. This critical step can concern many, as uneven squeegeeing may lead to lasting imperfections.
- Start from the Center: To effectively release trapped air, begin squeegeeing from the center and work outward towards the edges.
- Use Overlapping Strokes: Apply firm, overlapping strokes to maximize coverage and eliminate moisture pockets.
- Check for Bubbles: During this step, inspect the surface regularly to catch any air bubbles that must be worked out.
Step 8: Heat the Film
Once the film is smoothed out and properly positioned, activating the adhesive using a heat gun or hairdryer is time. Heating the film helps it conform to the curves and contours of your vehicle.
- Warm the Edges: Carefully run the heat gun along the edges of the film to ensure strong adhesion without warping.
- Gentle Heat Application: Use low to medium heat settings to prevent overheating the film, which could cause damage.
- Mould to Contours: As the film warms, gently manipulate it to fit the vehicle’s curves without causing ripples or folds.
Step 9: Trim Excess Film
Once the paint protection film (PPF) is applied and smoothed out, it’s essential to trim any excess material for a clean and professional appearance. Proper trimming prevents lifting edges that can attract dirt and moisture, compromising the film's effectiveness. A sharp utility knife is your best tool for this step, allowing you to achieve precision cuts along the vehicle's contours.
- Use a Steady Hand: Carefully control your knife as you cut along the edges of the film, ensuring you don’t damage the underlying paint.
- Leave a Margin: It's wise to leave a slight margin of film to tuck under body panels for a seamless look, enhancing the installation's performance and aesthetics.
- Inspect Your Work: After trimming, closely examine the edges for any areas needing additional smoothing or adjustments.
Step 10: Allow the Film to Cure
Curing the film after installation is crucial to ensure proper adhesion and performance. During this time, maintaining environmental conditions is important, as heat and moisture can impact how well the film bonds to the vehicle's surface.
- Avoid Washing: Do not wash the vehicle for at least 48 hours after installation to let the adhesive set properly.
- Keep in a Controlled Environment: If possible, park in a shaded area to minimize direct sunlight during curing, as excessive heat can affect adhesion.
- Patience Pays Off: Allowing adequate time for curing leads to optimal protection and longevity of your paint protection film installation.
Step 11: Final Inspection
A thorough final inspection is essential to ensure the installation meets your expectations. This step lets you catch imperfections or air bubbles before the film fully sets.
- Check for Bubbles: Look for any remaining air pockets under the film that could affect its appearance and durability. If you find any, use the squeegee to gently push them toward the edges, where they can escape.
- Examine the Edges: Ensure that all edges are securely adhered and that there are no liftings or wrinkles. Address any issues immediately to prevent further problems down the line.
- Enjoy the Results: Take a moment to appreciate your hard work. A successful installation provides peace of mind, knowing your vehicle is protected.
Protect Your Car with Professional PPF Installation
Whether you opt for a DIY approach or enlist the help of professionals, utilizing high-quality products like LLumar PPF can make all the difference. With proper care and maintenance, your investment in PPF will keep your vehicle looking stunning and provide peace of mind whenever you hit the road. Get the best protection for your car with LLumar PPF. Discover the difference it can make—schedule an appointment.